In this post
- At a Glance
- Why You Will Love This How To Mabe Pompom Otters
- Materials and Tools
- Choosing the Right Fabric
- Cutting and Preparation
- How to Sew the How To Mabe Pompom Otters Step by Step
- Variations and Ways to Customize It
- Common Mistakes and How to Fix Them
- Care and Washing
- Frequently Asked Questions
- Display Your Finished Yarn Otter
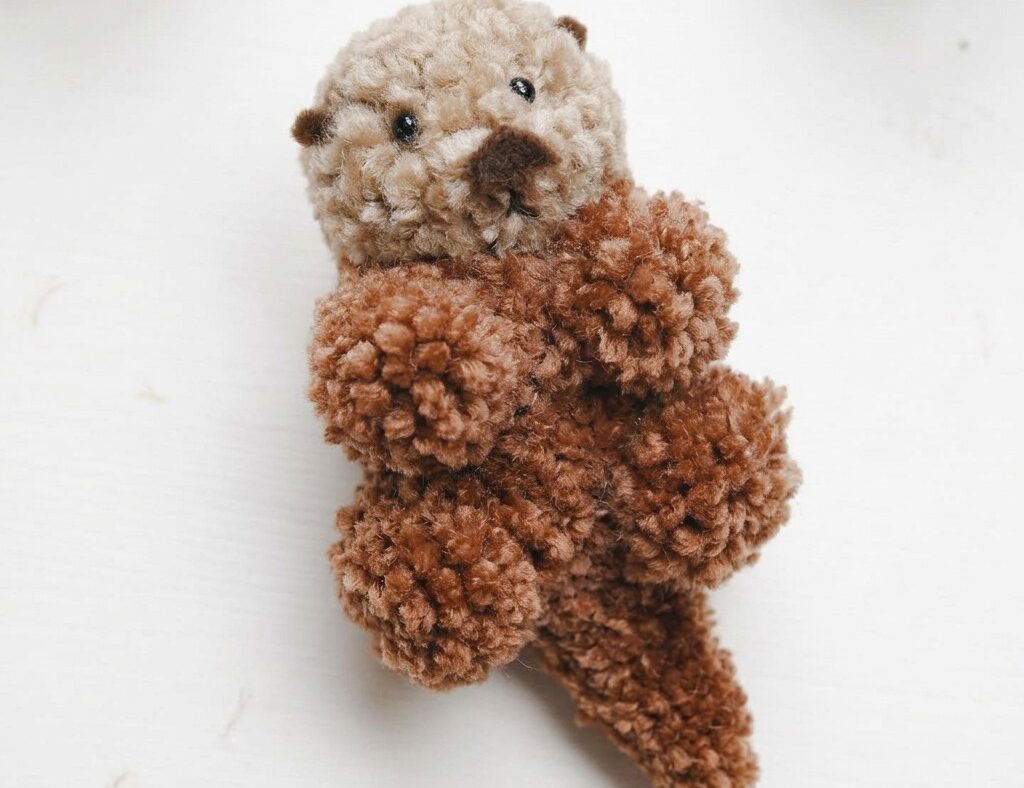
Learning how to make pom-pom otters is a creative way to turn simple skeins of yarn into a sculpted, tabletop companion. If you want to make a handmade gift or explore basic fiber sculpting without needing crochet hooks or knitting needles, this project breaks down the process into clear, manageable stages.
By layering colors on your maker tools and trimming dense yarn forms, you will build a solid head, an oval body, and clasping paws. You can complete the entire project in about 1 hour using basic craft tools and worsted weight yarn. Because this finished otter includes small bead eyes and glued parts, it is not suitable for children under 3 years old due to small parts. Follow along below to create your own freestanding yarn otter.
At a Glance
Before you begin wrapping your yarn, here is an overview of the key project specifications:
- Skill Level: Confident beginner
- Time: 1 hour
- Finished Size: approx. 4 in (10 cm) tall
- Main Fabric / Fiber: Worsted weight (size 4) acrylic yarn in Brown and Beige
Why You Will Love This How To Mabe Pompom Otters
Working with sculpted yarn allows you to create three-dimensional figures quickly without having to count complex crochet stitches or knit seamless rows. The density of tightly wrapped yarn gives you a solid base that behaves almost like soft clay, letting your detail scissors shape smooth contours, muzzle planes, and rounded paws with simple snips.
This method is also efficient with materials. A single 50 g (1.8 oz) skein of brown yarn and one of beige yarn provide plenty of yardage to make this project, with extra fiber left over. It offers the tactile satisfaction of shaping raw yarn into a recognizable animal figure through direct trimming and balanced gluing.
Materials and Tools
Having the correct tools on hand ensures your yarn wraps stay tight and your trimming cuts cleanly without pulling the strands loose.
- Worsted weight (size 4) acrylic yarn in Brown (1 skein, 50 g / 1.8 oz, approx. 100 yd / 91 m)
- Worsted weight (size 4) acrylic yarn in Beige (1 skein, 50 g / 1.8 oz, approx. 100 yd / 91 m)
- Two 4 mm black round beads for eyes
- 1 x 1 in (2.5 x 2.5 cm) scrap of dark brown craft felt for nose
- Strong clear craft glue or multi-purpose fabric glue
- Pom-pom maker set (2.5 in / 65 mm and 1.4 in / 35 mm sizes) or equivalent cardboard rings
- Sharp detail craft scissors for shaping and trimming
- Tapestry needle
- Ruler or tape measure
- Iron
Choosing the Right Fabric
The success of a sculpted yarn animal depends on yarn density, fiber memory, and stitch-like springiness rather than woven grain. A standard worsted weight (size 4) acrylic yarn works well because its crimped synthetic fibers expand and lock against each other once the loops are cut. This dense expansion creates an even surface that hides internal knots and supports deep scissor carving.
Avoid slippery mercerized cottons or loose single-ply roving yarns for this project. Cotton lacks the elasticity needed to hold tight center ties, while delicate roving pulls apart when sheared with fine-point scissors. Sticking to smooth or lightly textured acrylic worsted yarn gives you consistent bulk across both the 2.5-inch (65 mm) and 1.4-inch (35 mm) maker tools.
Pro tip: Pull your yarn snugly as you wrap each arch. High tension creates a denser core, making it much easier to carve smooth shapes without creating hollow spots or loose strands.
Cutting and Preparation
Preparing your workspace and materials before wrapping ensures every component matches the required scale and density.
- Set up your 2.5-inch (65 mm) and 1.4-inch (35 mm) pom-pom maker tools on a clean, flat surface with your sharp detail craft scissors nearby.
- Cut four separate 12-inch (30 cm) lengths of brown worsted weight yarn to serve as heavy-duty center ties for your pom-poms.
- Cut a 1 x 1 in (2.5 x 2.5 cm) square of dark brown craft felt to have ready for trimming the nose piece during final assembly.
How to Sew the How To Mabe Pompom Otters Step by Step
Follow the complete sequence below to wrap, cut, sculpt, and assemble your yarn pieces into a stable, freestanding otter figure.
Finished size: approx. 4 in (10 cm) tall, 2.5 in (6.3 cm) wide, 2.75 in (7 cm) deep
Pattern Notes
- All pom-poms are wound firmly to create dense, sculptable fiber balls.
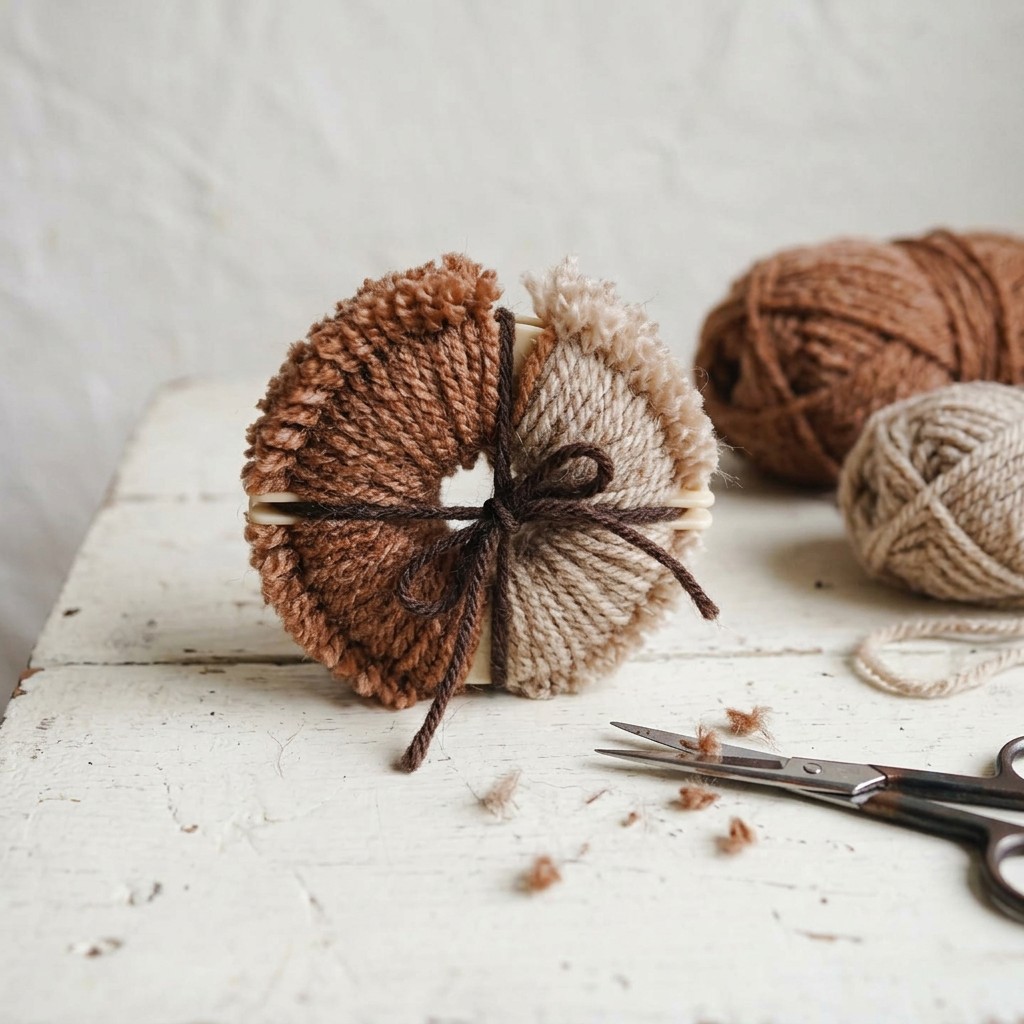
- For the two-toned head pom-pom, beige yarn is wound on the inner layer of one arch to form the muzzle, and brown yarn is wound over it and across the remaining arch for the skull and back of the head.
- When tying off pom-poms, use a strong double knot and leave the tying tails long (approx. 10-12 in / 25-30 cm) to help secure the parts together during assembly.
- Sharp embroidery or precision craft scissors are essential for sculpting smooth, clean contours.
Head Pom-Pom (Beige and Brown)
- Wrap beige yarn 70 times around the first arch of a 2.5-inch (65 mm) pom-pom maker to create the lower face and muzzle foundation (70 wraps)
- Wrap brown yarn 70 times directly over the beige layer on the first arch to fill it completely (140 wraps)
- Wrap brown yarn 140 times around the second arch of the maker for the back of the head (280 wraps)
- Close the maker, cut through the loops around the middle groove, and tie firmly with a 12-inch (30 cm) brown yarn strand (1 pom-pom)
- Trim and sculpt the pom-pom with sharp scissors into an egg-like head shape, flattening the beige muzzle area slightly (1 head)
Body Pom-Pom (Brown)
- Wrap brown yarn 130 times around the first arch of a 2.5-inch (65 mm) pom-pom maker (130 wraps)
- Wrap brown yarn 130 times around the second arch of the pom-pom maker (260 wraps)
- Cut loops along the center channel and tie securely with a 12-inch (30 cm) brown yarn strand (1 pom-pom)
- Trim and sculpt the body into an oval pear shape, slightly narrower at the top neck edge (1 body)
Paws and Limbs (Brown)
- Wrap brown yarn 50 times around each arch of a 1.4-inch (35 mm) pom-pom maker, cut loops, and tie tightly (1 pom-pom)
- Cut the small pom-pom in half along the center tie and trim each half into a small oblong front paw approx. 0.75 in (2 cm) long (2 front paws)
- Make a second 1.4-inch (35 mm) brown pom-pom with 50 wraps per arch, cut loops, and tie securely (1 pom-pom)
- Cut this pom-pom in half and trim each piece into a flat-bottomed back foot approx. 0.8 in (2 cm) long (2 back feet)
Tail and Ears (Brown)
- Wrap brown yarn 45 times around both arches of a 1.4-inch (35 mm) pom-pom maker, cut loops, and tie securely (1 pom-pom)
- Sculpt and shear the pom-pom into a tapered 1.5 in (3.8 cm) long otter tail shape (1 tail)
- From the trimmed dense yarn offcuts, sculpt and trim 2 tiny semi-circular ear tufts approx. 0.3 in (8 mm) wide (2 ears)
Finishing
- Tie the long center tails from the head and body together tightly with a double knot. Apply a generous dab of strong craft glue between the neck connection for stability, then trim away excess tying yarn.
- Cut a small rounded triangle (approx. 4 mm wide) from the brown craft felt scrap for the otter’s nose.
- Apply a small drop of glue to the back of the felt nose and press it firmly into the center of the beige muzzle area.
- Part the yarn fibers slightly on each side of the upper muzzle and glue the two 4 mm black bead eyes in place, spacing them about 0.5 in (1.3 cm) apart.
- Apply craft glue to the base of each small sculpted ear and press into the fur on either side of the top of the head.
- Glue the two front paws onto the upper chest area of the body pom-pom so they meet together in the center, creating the classic clasping otter pose.
- Glue the two back feet side-by-side to the bottom underside of the body pom-pom so the otter sits stably on a flat surface.
- Glue the tapered tail to the lower back of the body pom-pom, extending backward.
- Allow the glue to dry completely for at least 30 minutes, then do a final precision trim with sharp scissors to blend all seams smoothly.
Variations and Ways to Customize It
While this pattern produces a single-sized, freestanding project, you can adapt small design features within the framework of the instructions:
- Color Placement: Extend the beige wrapping slightly higher on the first arch to create wider cheek patches or a taller muzzle.
- Pencil or Flower Grip: Adjust the placement of the front paws so they angle outward slightly, allowing the otter to clasp a small paper flower or mini craft item between its paws.
- Size Limitations: Note that other sizes are not covered by this pattern; changing maker sizes requires different wrap counts to maintain the necessary carving density.
Common Mistakes and How to Fix Them
Sculpting fiber takes a bit of practice. Here is how to diagnose and correct common assembly issues:
- Loose Center Core: If strands pull out while trimming, your center tie was not pulled tightly enough. Fix this by dabbing clear craft glue deep into the center channel before carving further.
- Head Wobble: If the head tilts loosely on top of the body, apply an additional drop of strong clear craft glue directly between the neck joint and hold the two pieces together firmly for 60 seconds.
- Asymmetrical Muzzle: If the beige face looks lopsided, make shallow, conservative snips across the fuller side rather than deep single cuts.
- Wobbly Base: If the otter tips over, trim the bottom surface of the back feet completely flat with your scissors so the figure rests evenly on the table.
Care and Washing
Preserve the shape, glued joints, and dense fiber structure of your finished project with gentle surface maintenance.
Spot clean only with a damp cloth and mild soap; do not submerge in water or place in the washing machine. Submerging the figure will weaken the craft glue holding the limbs, eyes, and felt nose, and machine agitation will unravel the trimmed yarn fibers.
Frequently Asked Questions
Can I make this project using cardboard templates instead of a plastic maker?
Yes, you can use sturdy cardboard rings cut to outer diameters of 2.5 inches (65 mm) and 1.4 inches (35 mm). Be sure to wind the yarn smoothly through the center hole until the inner ring is completely packed to achieve the same density.
What type of glue works best for assembling the components?
A strong clear craft glue or multi-purpose fabric glue provides a reliable hold. Avoid runny school glues, which soak into the yarn without bonding, and avoid low-temperature hot glue guns if stringy residue is difficult to control around small bead eyes.
Why do my pom-poms look uneven before trimming?
Freshly cut yarn loops naturally flare out at uneven lengths right after cutting. The tight spherical and oval shapes only emerge once you sculpt the outer surface with sharp detail scissors according to the pattern steps.
Can I brush out the acrylic yarn with a wire pet brush?
Brushing is not recommended for this specific project because it alters the sheared density. The instructions rely on crisp scissor sculpting rather than brushed fluff to keep the limbs, ears, and muzzle well-defined.
Display Your Finished Yarn Otter
Once you finish making your pom-pom otter, you will have a freestanding 4-inch desk mascot with classic clasping paws. Taking your time during the scissor-sculpting phase makes all the difference in achieving clean lines and balanced facial features. Set your new creation on a bookshelf, desk, or gift box and enjoy the unique texture of handcrafted yarn art.