In this post
- What It Is and When to Use the Magic Ring Technique
- Tools and Materials for Practicing How to FINALLY Master the Magic Loop
- Choosing the Right Yarn and Hook
- Step-by-Step Method to Form the Magic Loop
- Working Your First Stitches Into the Ring
- Pulling the Tail to Close the Center Ring
- Joining and Continuing Your Round
- Pro Tips for Flawless Results
- Common Mistakes and How to Fix Them
- Quick Practice Project Idea
- Care and Washing
- Frequently Asked Questions
- Master Your Closed Circles with Confidence
If you have ever started a circular crochet pattern only to find an unwanted gap right in the center, learning How to FINALLY Master the Magic Loop will transform your finished items. Many beginners struggle with loose starting rings, twisted working yarn, or stitches that pull unevenly. This step-by-step guide breaks down the adjustable ring technique for beginner crocheters in a straightforward 30-minute practice session. Using simple single crochet stitches worked into an adjustable foundation, you will learn how to create seamless, tight centers for everything from solid amigurumi toys to flat home accessories.
What It Is and When to Use the Magic Ring Technique
The magic loop—often called the magic ring or adjustable loop—is a foundation technique in crochet that creates an open circle that can be drawn completely shut. Traditional starting methods, such as chaining four and joining with a slip stitch, leave a permanent hole in the center of your work. That hole can allow polyester stuffing to poke through plush toys or create an unwanted open design in solid motifs.
You will use this technique whenever a pattern begins from the center outward. It is the gold standard starting method for amigurumi, solid coasters, top-down beanies, and granny squares where a solid center is required. Because the circle adjusts around a sliding tail, you control the final tension and eliminate any open gaps.
Tools and Materials for Practicing How to FINALLY Master the Magic Loop
Setting up your workspace with the proper tools ensures you can see every loop clearly while training your hands to manage the sliding yarn tail.
- 50g bulky weight yarn in mint green: Bulky weight (5) or super bulky weight (6) wool or acrylic yarn provides clear stitch definition.
- Scrap yarn for practice: Useful for working several practice rings in succession without cutting into your main skein.
- 6.5 mm / K-10.5 crochet hook: An ergonomic hook with a comfortable grip allows smooth movement through thick strands.
- Yarn needle: A blunt metal tapestry needle is necessary for weaving the yarn tail securely so the center never shifts.
- Scissors: Sharp craft scissors ensure clean cuts without fraying your fiber ends.
Choosing the Right Yarn and Hook
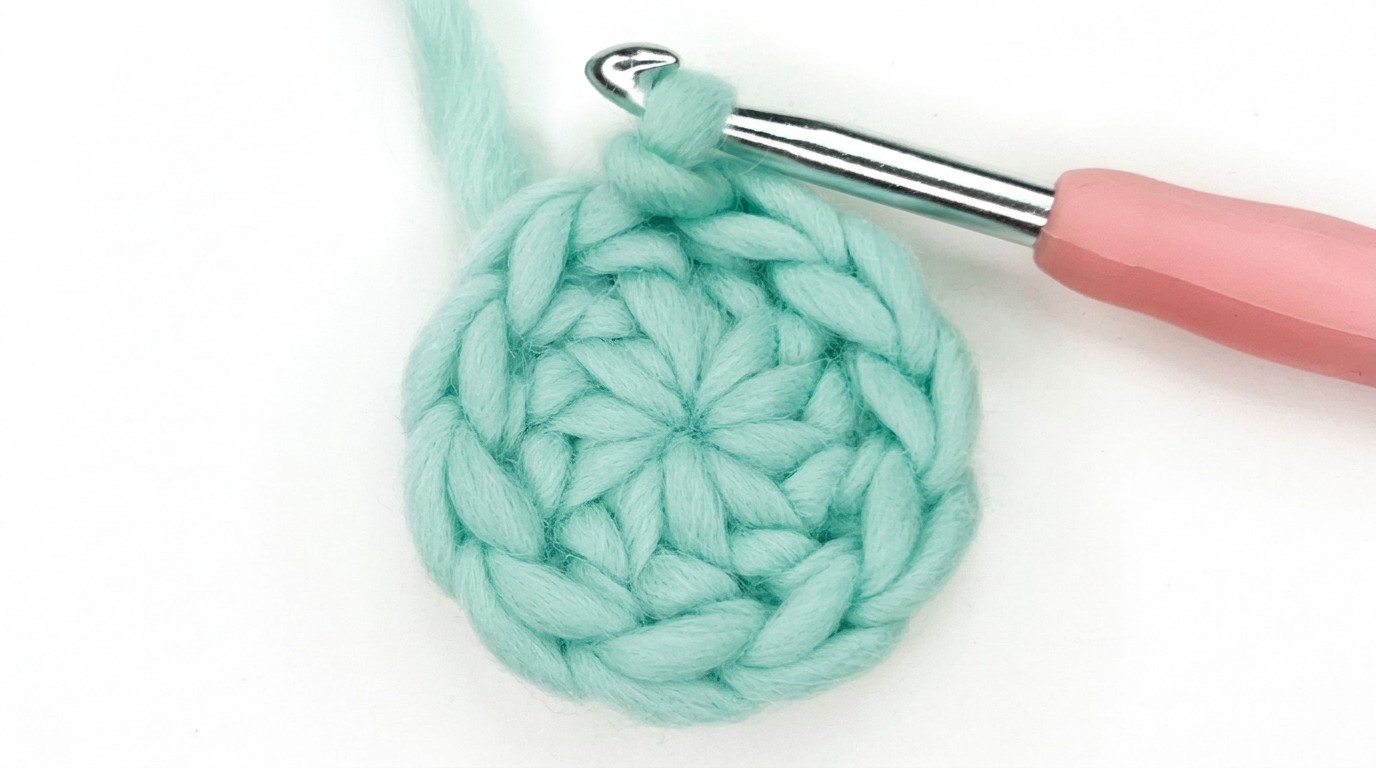
Working with bulky weight (5) or super bulky weight (6) wool or acrylic yarn gives you immediate visual feedback. The plush mint green yarn featured in this practice session creates distinct, raised V-shaped stitches that are easy to count and manipulate. When the yarn strands are thick, you can easily identify the two strands of the adjustable circle and avoid splitting your working yarn.
Avoid fuzzy novelty yarns, dark fibers, or loosely plied threads when you first learn this technique. Slippery or textured fibers can catch on themselves when pulled, preventing the loop from sliding closed smoothly. Pairing a 6.5 mm (K-10.5) hook with bulky yarn maintains a gauge of 10 sts x 10 rows = 4 in (10 cm) in single crochet, ensuring your initial stitches remain open enough to receive your hook easily in the next round.
Pro tip: Keep an ergonomic hook resting lightly in your hand; gripping too tightly during the foundation ring naturally creates tight stitches that are difficult to close later.
Step-by-Step Method to Form the Magic Loop
Establishing the foundation loop properly ensures the tail can slide through the base of your stitches without binding.
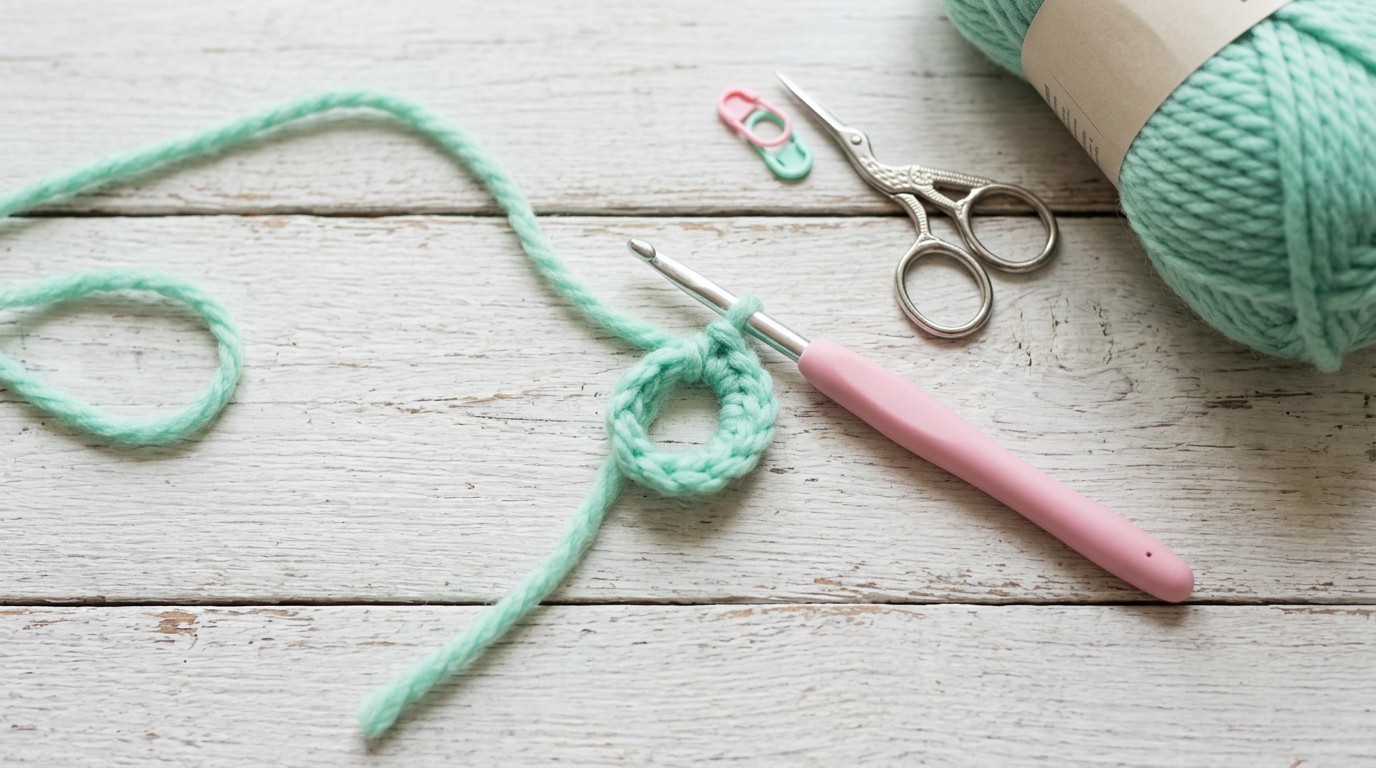
- Form the loop: Make a loop with the working yarn, leaving a 6-inch (15 cm) tail. Cross the working yarn over the tail end so that the working strand sits on top, forming a circle roughly 1.5 inches (3.8 cm) in diameter.
- Insert your hook: Insert the 6.5 mm crochet hook through the center of the loop from front to back, keeping the crossed strands pinched gently between your thumb and middle finger.
- Catch the working strand: Yarn over by hooking the working yarn (not the cut tail) and pull up a loop through the center of the ring. You now have one active loop resting on your hook.
- Secure the base: Chain 1 (ch 1) by yarning over with the working yarn and drawing it through the loop on your hook. This chain locks the sliding foundation in place.
Working Your First Stitches Into the Ring
Once the base is secured with a chain 1, you will begin working your pattern stitches directly over the ring structure.
- Work single crochet stitches: Insert the 6.5 mm hook into the center of the ring, making sure your hook passes under both the main circle loop and the 6-inch yarn tail. Yarn over, pull up a loop through the ring (2 loops on hook), yarn over, and pull through both loops to complete one single crochet (sc). Repeat this process to work the required number of sc stitches (typically 6 for standard circular rounds) directly into the ring over both strands.
Pro tip: Always verify that the cut yarn tail runs parallel to the main circle ring. Your stitches must encase both yarn strands at the same time for the sliding mechanism to function.
Pulling the Tail to Close the Center Ring
With all initial single crochet stitches worked over the double strand, closing the opening requires firm, even tension. Hold the base of your crochet stitches gently between your thumb and index finger to keep them from curling over each other. Grasp the 6-inch yarn tail with your opposite hand and pull the tail firmly in a straight line away from the stitches.
As you pull, the foundation circle will shrink, bringing the first and last single crochet stitches together until the center hole closes completely. Do not yank abruptly on the tail, as aggressive pulling can snap delicate fibers or cause bulky wool to bind up. Once the center is tight, leave the tail hanging at the back of the work so it can be securely woven in later with your yarn needle.
Joining and Continuing Your Round
After closing the center circle, you must connect the beginning and end of the circle based on whether your pattern calls for joined rounds or continuous spirals.
- Complete the foundation round: To work in joined rounds, insert your hook under both top loops of the very first single crochet stitch made (skipping the initial ch-1). Yarn over and pull through the stitch and the loop on your hook to complete a slip stitch (sl st). To work in continuous spiral rounds (common in amigurumi), do not slip stitch; place your stitch marker and work the first stitch of Round 2 directly into the top of that first single crochet.
Pro Tips for Flawless Results
Refining your hand positioning and yarn management prevents common frustrations when making circular crochet foundations.
- Maintain relaxed tension: Keep your chain 1 and single crochet stitches slightly loose. If your stitches are too tight, the friction against the core strand increases, making the ring hard to close.
- Keep the tail accessible: Ensure your 6-inch tail never slips out from underneath your single crochet stitches. If you accidentally stitch over only one strand, the magic ring cannot cinch shut.
- Anchor the tail securely: After finishing your project, thread the starting tail onto a yarn needle and weave it through the base of the stitches in three different directions to lock the center permanently.
- Count before closing: Always count the V-shaped tops of your single crochet stitches before cinching the ring completely tight, as adding missed stitches afterward is impossible.
Common Mistakes and How to Fix Them
If your adjustable circle is not behaving correctly, use this reference table to identify the issue and apply the practical fix.
| Problem | Root Cause | Corrective Action |
|---|---|---|
| Ring will not pull closed | Stitches worked too tightly or over working yarn instead of tail | Loosen stitch tension on Round 1 and ensure stitches enclose both the ring and the free tail. |
| Center hole pops back open | Tail was cut short or not woven in multiple directions | Leave at least 6 in (15 cm) of tail and weave back and forth through stitch bases using a yarn needle. |
| Stitches twist around the ring | Foundation loop was twisted during initial chain 1 | Keep the initial circle flat against your fingers before pulling up the first securing loop. |
| Yarn breaks when cinching | Pulling the tail too hard or against stitch friction | Gently push the stitches along the strand while easing the tail closed rather than yanking hard. |
Quick Practice Project Idea
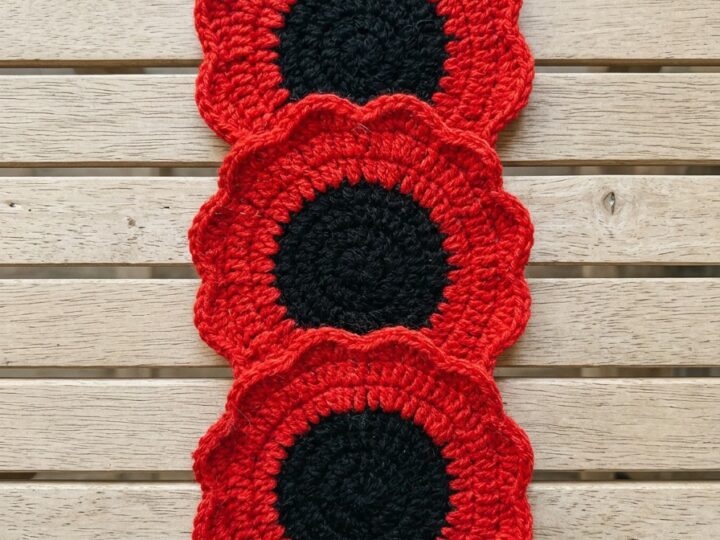
Apply your new skill by making a solid circular drink coaster using your 50g mint green bulky weight yarn and 6.5 mm (K-10.5) hook. This 30-minute project lets you practice starting with a magic ring, working flat circular increases, and weaving in the tail securely. Stitches are listed in US terms: chain (ch), slip stitch (sl st), and single crochet (sc).
Gauge for this project is 10 sts x 10 rows = 4 in (10 cm) in single crochet. Work in joined rounds, joining each round with a sl st to the first st of the round.
Rnd 1: Make a magic loop, ch 1, work 6 sc into the ring. Pull tail firmly to close ring. Join with sl st to first sc. (6 sts)
Rnd 2: Ch 1 (does not count as st here and throughout), work 2 sc in each st around. Join with sl st to first sc. (12 sts)
Rnd 3: Ch 1, *sc in next st, 2 sc in next st; repeat from * around. Join with sl st to first sc. (18 sts)
Rnd 4: Ch 1, *sc in next 2 sts, 2 sc in next st; repeat from * around. Join with sl st to first sc. Fasten off and weave in all yarn ends securely. (24 sts)
Care and Washing
Proper cleaning preserves the structural integrity of your magic loop projects. For bulky weight wool items, hand wash in cool water using a gentle wool wash, press out excess water between clean towels without wringing, and lay flat to dry to maintain accurate circular dimensions. For acrylic yarn items, machine wash on a delicate cycle in cool water inside a mesh laundry bag, then lay flat to air dry. Never hang circular crochet pieces while wet, as water weight can pull the center stitches out of shape.
Frequently Asked Questions
What is the difference between the magic loop in crochet and knitting?
In crochet, the magic loop refers to an adjustable starting ring that closes a center hole when worked from the inside out. In knitting, magic loop is a technique using a long circular needle cable to knit small circumferences without double-pointed needles.
Why does my magic loop keep coming undone or opening back up?
The magic ring relies purely on friction until it is permanently anchored. If you simply cut the tail after pulling it closed, movement and washing will loosen the ring; you must weave the tail through the base stitches in at least three opposing directions.
Can I use the magic loop technique with super bulky yarn?
Yes, super bulky weight (6) yarn works well with this method. However, because thick fibers create more friction, work your initial single crochet stitches with relaxed tension to allow the center tail to slide shut without snapping.
How do I weave in the tail so the center hole stays closed forever?
Thread the 6-inch yarn tail onto a blunt yarn needle and guide it under the base of the stitches on the wrong side around the circle. Reverse your direction and weave back through the stitches, then reverse once more, splitting the plies slightly to lock the fiber in place.
Master Your Closed Circles with Confidence
Understanding How to FINALLY Master the Magic Loop removes one of the most common obstacles in circular crochet, giving your hats, coasters, and amigurumi a tight, gap-free foundation every single time. As you practice your tension using your 6.5 mm hook and bulky yarn, remember that the secret lies in keeping your foundation stitches loose enough to slide while firmly locking the tail in place with a yarn needle when finishing. Pick up your hook, work a few test rounds, and enjoy clean, professional results on all your round projects.