In this post
- At a Glance: Teach Kids Crochet
- Why Granny Squares Are Perfect to Teach Kids Crochet
- Materials and Tools Needed
- Choosing the Right Yarn and Hook for Young Learners
- Step 1: Starting the Ring
- Step 2: Working Round 1
- Step 3: Working Round 2 and Corners
- Finishing and Weaving in Ends
- Variations and Customizing
- Troubleshooting Common Beginner Issues
- Care and Washing Instructions
- Frequently Asked Questions
- Start Stitching with Young Crafters
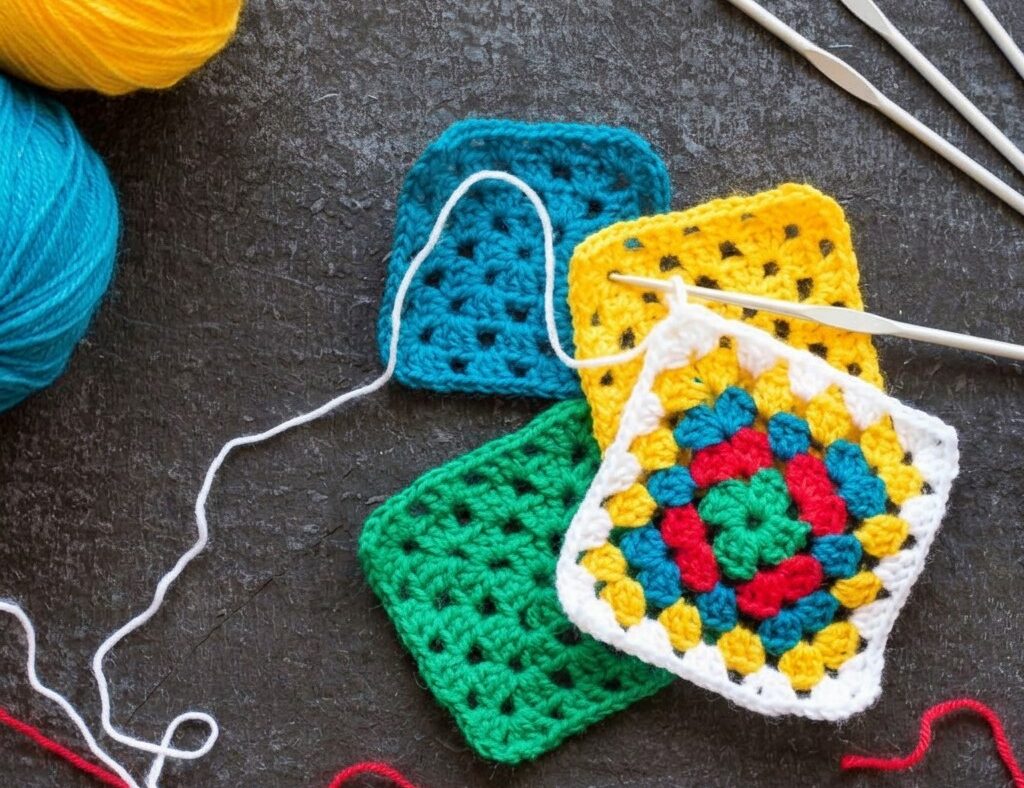
When you want to teach kids crochet, choosing an approachable, bite-sized project makes all the difference. Learning yarn crafts builds fine motor skills, hand-eye coordination, and patience, but long scarf projects often lead to frustration before a child sees real progress. A simple two-round granny square gives young learners immediate success in a single sitting. Designed for the absolute beginner, this project teaches the core mechanics of making chains, working double crochet clusters in the round, and managing tension without overwhelming small hands. Each finished square measures 4 in x 4 in (10 cm x 10 cm) and takes about 1 hour per square to complete. By focusing on wide chain spaces rather than tiny individual stitch loops, children quickly grasp where to insert their hook, building the confidence they need to keep stitching.
At a Glance: Teach Kids Crochet
Before introducing yarn and hooks to a young crafter, reviewing the project specifications ensures realistic expectations and smooth pacing throughout the lesson.
| Skill Level | Beginner |
|---|---|
| Time Required | 1 hour per square |
| Finished Size | 4 in x 4 in (10 cm x 10 cm) |
| Yarn Weight | Worsted weight (4) acrylic yarn |
| Hook Size | 5 mm / H-8 aluminum crochet hook |
| Key Technique | Working double crochet clusters into chain spaces |
| Gauge | 14 sts x 7 rows = 4 in / 10 cm in dc |
Why Granny Squares Are Perfect to Teach Kids Crochet
Traditional row-by-row crochet patterns require working into the narrow top loops of stitches, which can be challenging for children still developing dexterity. The classic granny square solves this problem by directing the hook into wide, open chain spaces. When kids aim for a large gap instead of a tight loop, their hook catches easily, reducing dropped loops and split strands.
Working in rounds also creates a fast visual reward. A child sees the shape expand outward from the center with every cluster of double crochet stitches they complete. This rapid growth keeps attention spans engaged and provides a tangible sense of accomplishment inside an hour. Because the stitch rhythm repeats consistently—three double crochets followed by corner chains—children memorize the pattern quickly without needing to constantly read complex charts.
Pro tip: Have children chant the rhythm out loud as they work: “Yarn over, dip in the big hole, grab the yarn, pull through, pull through two, pull through two.” Rhythm helps establish muscle memory faster than visual correction alone.
Materials and Tools Needed
Setting up a dedicated workspace with the correct tools prevents mid-project interruptions and helps young hands handle the yarn smoothly.
- Assorted worsted weight (4) acrylic yarn: Bright colors like yellow, turquoise, white, and red allow children to see their stitches clearly against their working background.
- 5 mm / H-8 aluminum crochet hook: A smooth metal hook glides through acrylic fibers without snagging.
- Tapestry needle: A blunt-tipped metal or plastic yarn needle is required for weaving in tails safely without puncturing fingers.
- Scissors: Small, blunt-ended craft scissors ensure safety when trimming yarn ends.
Choosing the Right Yarn and Hook for Young Learners
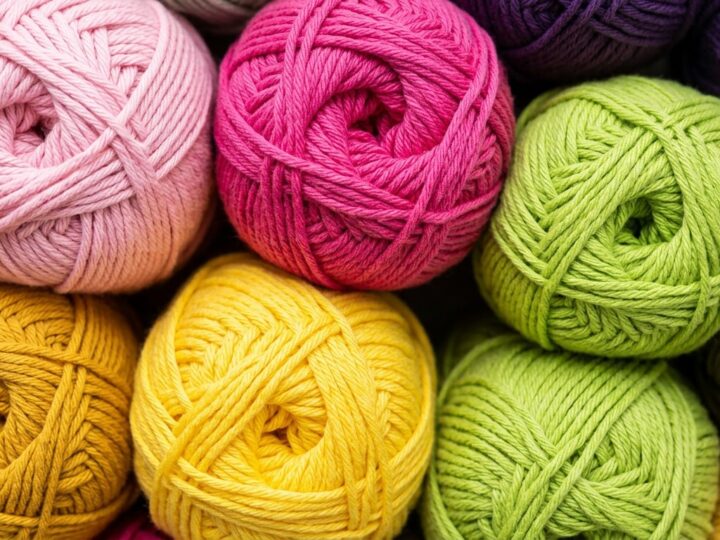
The physical properties of your materials directly affect a child’s initial learning curve. Worsted weight (4) acrylic yarn provides enough thickness for small fingers to manipulate without being too heavy or bulky. Acrylic fiber also offers slight elasticity, which forgives uneven beginner tension. Avoid single-ply, roving, or fuzzy yarns, as these split easily when caught by an imprecise hook angle.
Color selection matters just as much as yarn weight. High-contrast, vibrant shades like turquoise and yellow make stitch definitions obvious, whereas dark black or navy yarn hides stitch openings and strains young eyes. Pair this yarn with a 5 mm / H-8 aluminum crochet hook. The inline or tapered throat of an aluminum hook lets yarn slide with minimal friction, preventing the tight, stuck stitches that often happen with wooden or plastic tools.
Step 1: Starting the Ring
The foundation of every granny square begins in the center, establishing the base circle into which all initial stitches anchor.
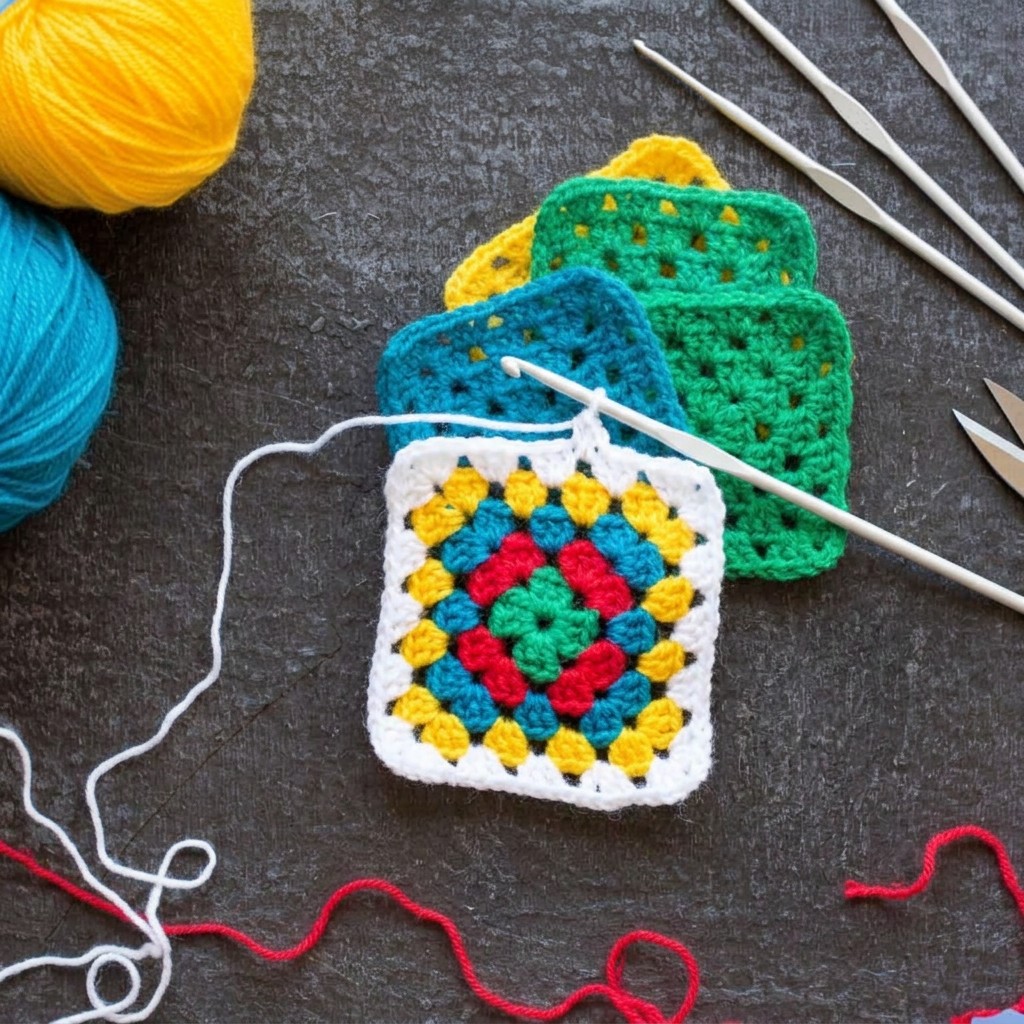
- Form a slip knot: Create a loop with your worsted weight (4) acrylic yarn, leaving a 4-inch (10 cm) tail. Draw the working yarn through the loop and slide it onto the 5 mm / H-8 aluminum crochet hook, pulling gently to snug the knot against the shaft.
- Chain 4: Yarn over and pull through the loop on the hook 4 times (ch 4). Keep these chains relaxed so the hook passes back through easily.
- Close the ring: Insert the hook into the first chain made (the furthest from the hook). Yarn over and pull through both the chain loop and the active loop on your hook (sl st). A small hole is now visible in the middle of the circle.
Pro tip: Insert a fingertip directly into the center hole of the chain ring to hold it open while guiding the child where to place the hook for the first round.
Step 2: Working Round 1
With the center ring formed, the first round establishes the four sides and four corners of the square.
- Work the first cluster: Chain 3 (this counts as your first double crochet stitch). Work 2 double crochet (dc) stitches directly into the center hole of the ring, not into the individual chain strands. Chain 2 to create the first corner space. (1 cluster, 1 corner)
- Add the remaining clusters: Work 3 dc into the center ring, then chain 2. Repeat this sequence (3 dc, ch 2) two more times into the center ring. (4 clusters, 4 corner ch-2 spaces)
- Join the round: Insert the hook into the top of the beginning chain-3. Yarn over and pull through the stitch and active loop to slip stitch (sl st) the round closed. (Total: 12 dc, 4 ch-2 spaces)
Step 3: Working Round 2 and Corners
The second round doubles the size of the piece and defines the square shape with distinct corner increases.
- Navigate to the corner: Slip stitch loosely across the top loops of the next 2 double crochet stitches, then slip stitch directly into the adjacent chain-2 corner space.
- Form the first corner group: Chain 3 (counts as first dc). Work 2 dc, chain 2, and 3 dc all into that same first corner space. (First corner complete)
- Complete the remaining corners: In each of the next three chain-2 corner spaces around the square, work (3 dc, ch 2, 3 dc). (Total: 8 clusters of 3 dc, 4 ch-2 spaces)
- Join and secure: Slip stitch to the top of the beginning chain-3. Cut the yarn leaving a 4-inch (10 cm) tail, yarn over, and pull the tail completely through the working loop to fasten off. The piece now measures 4 in x 4 in (10 cm x 10 cm).
Pro tip: Count the 3-dc clusters together at the end of Round 2. Verify there are exactly 8 groups of 3 stitches separated by 4 corner spaces before cutting the yarn.
Finishing and Weaving in Ends
Securing the loose yarn ends ensures that the finished square withstands everyday handling and washing without coming undone.
Thread the 4-inch (10 cm) yarn tail onto a blunt tapestry needle. Guide the needle horizontally through the backs of the double crochet stitches in the nearest cluster, running under at least 4 to 5 stitches. Turn the needle around and weave back in the opposite direction through the same stitches, skipping the very first loop edge so you do not pull the thread out. Weaving in three alternating directions locks the acrylic fibers together securely.
Next, locate the starting tail at the center ring. Pull it snug to close the center hole tightly, then weave that tail under the base of the Round 1 stitches in a complete circle. Trim all remaining tail ends flush with the fabric using scissors. Small children should always be supervised while handling scissors and sewing needles.
Variations and Customizing
Once young crafters understand the basic two-round construction, experimenting with color and layout keeps the practice exciting.
- Two-tone color changes: Fasten off after Round 1 and join a contrasting color in any chain-2 corner space using a slip stitch before starting Round 2.
- Multicolor scrap squares: Use leftovers of bright yellow, turquoise, red, and white yarn for different rounds to make every square unique.
- Solid texture squares: Work both rounds in a single solid color to help the child focus entirely on uniform tension without managing color joins.
- Joining practice: Whipstitch several finished 4-inch squares together using a tapestry needle and matching yarn to practice basic assembly.
Troubleshooting Common Beginner Issues
Learning stitch control takes practice, and minor mistakes are an expected part of developing hand coordination.
| Problem | Likely Cause | Easy Fix |
|---|---|---|
| Square curls into a bowl shape | Tension is too tight, or corner chains were skipped. | Ensure 2 chains are worked between every corner cluster, or switch to a slightly looser grip. |
| Piece looks circular rather than square | Missing the second 3-dc cluster in corner spaces. | Check that every corner contains two distinct 3-dc groups separated by a ch-2. |
| Edges flare or ruffle excessively | Extra stitches worked into side spaces or too many chains. | Verify that only corner spaces receive stitches in Round 2; do not add chains along flat sides. |
| Hook snags and splits yarn plies | Hook angle is too steep or yarn tension is uneven. | Rotate the hook throat downward toward the work as you pull loops through. |
Care and Washing Instructions
Acrylic granny squares are durable and easy to clean, making them practical for items handled by children. Hand wash the finished squares in cool water using a mild liquid detergent to preserve the stitch definition. Gently squeeze out excess moisture by pressing the square between clean towels—never wring or twist the fabric, as this stretches the acrylic stitches out of shape. Lay the square flat on a dry towel to air dry, gently shaping it into its 4 in x 4 in (10 cm x 10 cm) square dimensions with your fingers.
Frequently Asked Questions
What age is suitable to start teaching kids crochet?
Most children develop the necessary fine motor control and bilateral coordination around ages 7 to 9. Younger children around age 5 or 6 can participate by practicing basic chain stitches or finger crochet before progressing to standard hooks.
Is a crochet hook or knitting needle easier for a child to start with?
A crochet hook is generally easier for beginners because you only manage a single active stitch on the hook at any given time. Knitting requires balancing multiple live loops across two separate needles, which increases the likelihood of dropped stitches.
Why is acrylic yarn recommended for children learning to crochet?
Worsted weight acrylic yarn provides distinct stitch visibility, mild elasticity, and high durability at an affordable price point. It holds up well to repeated unravelling and re-stitching while young learners master their technique.
How do you keep a child from pulling their crochet stitches too tight?
Encourage the child to rest the loop on the wide shaft of the hook rather than pulling it tight against the narrow neck. Remind them to lift their hook upward slightly after drawing up a loop to maintain consistent stitch height.
Start Stitching with Young Crafters
When you teach kids crochet with a classic two-round granny square, you give them a complete, satisfying creative experience in just 1 hour per square. Mastering the simple 4 in x 4 in (10 cm x 10 cm) motif builds real competence in reading stitches, controlling yarn flow, and finishing projects neatly. Keep practice sessions short, celebrate each completed round, and let the child pick their favorite yarn colors to make every stitching session an enjoyable success.